Overview
The Manage Team page is where you can view and manage the users in your Jobber account. It is where a new user can be added, or existing users can be edited or deactivated.
To navigate to the manage team page:
- Select the Gear Icon.
- Select Manage Team.
Users are anyone invited to your Jobber account, regardless if they’ve accepted their invitation. Only admin users can access the Manage Team page.
Different user limits are available on each plan. View our current pricing plans.
To check what plan you’re on, navigate to the Gear Icon then select Account and Billing. If you have any questions about your plan’s features or pricing, our support team is here to help!
Add new team members to your Jobber account
To add a new team member in Jobber:
- Click the Gear Icon.
- Select Manage Team.
- Click Add User.
- Enter the team member’s name and email address.
- Choose their permission level, and customize access if needed.
- Click Save to send the invitation.
An email is required for a user to log in to Jobber. The email address cannot be associated with another Jobber account, otherwise you’ll see an error stating that the email is already taken.
To resolve this, the team member can:
- Be removed from the other account
- Use a different email address
- Create an email alias through their email provider
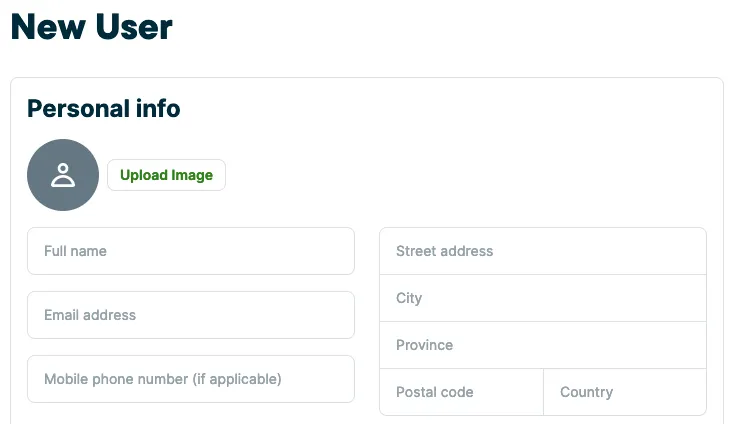
If you are using job costing, a field will appear for Labor cost. This is where you’ll enter the employee cost in dollars per hour. The employee cost should include the employee’s wage, benefits, and taxes.
Next, select the user’s permission level. The user’s permissions are what provides or limits their access to information in your account. By default, the permission level is set to Field crew, which is the lowest permission level. There are four preset permission levels, but each can be customized further in the custom permission settings. Select the Custom option to expand the permissions options.
Note: If a team member’s permission level shows as Custom but you don’t remember setting it that way, it’s likely because they were assigned one of the preset levels before Jobber updated the preset definitions. Their actual permissions haven’t changed.
Learn more about user permissions.
Team members and online booking
Team members will be assigned to appointments booked online based on their availability. To edit employee availability for online booking:
- Click the Gear Icon, then select Manage Team.
- Click the team member whose availability you want to customize to open their details.
- From the availability for online booking section, click Edit.
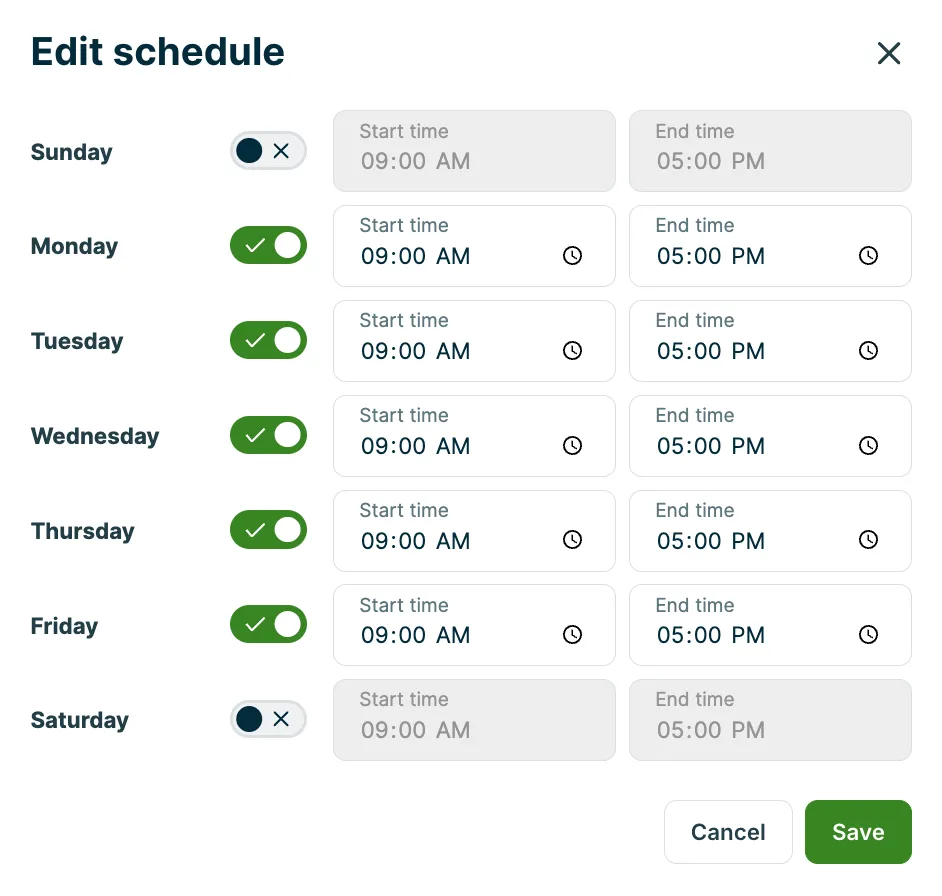
- Customize each day of the week this employee is available and what their start and end times on that day are.
- Click Save when you are done.
The team member’s availability can be set for each day of the week. If more than one team member is available at a given time slot, the appointment will be assigned randomly.
If a team member will be on vacation, a task can be added to the schedule for their time away and assigned to them to block that team member from being booked during that time through online booking. This must be a task (or visit) with scheduled start and end times. A calendar event won’t block the team member from being assigned with online booking.
Bookable hours are populated from your business hours set up in company settings.
Active users

From the Manage Team page, you can also view the number of active users in your account. Each subscription for Jobber comes with an allotted number of users. The active users count shows how many users you have in relation to your user limit.
Active users are any user that has been added to the account who has not been deactivated or deleted. This means that when you add a new user, they are considered active even before they accept their invitation.
Note: If you have multiple Jobber accounts and they have been set up as a franchise so that you can toggle between accounts, the process to add a user is the same as above. To add a new user, in each account you want to add them to, navigate to the Manage Team page and click New User then enter their information. Make sure that their email address is entered exactly the same in each account, then click Save. Their user permissions will be the same across all accounts that the user is in. If their permissions need to be updated in the future, an admin user can edit them from the primary account.
Add or manage additional user seats
If you need more users than your plan’s base limit allows, you can purchase additional seats in bulk within your account. If you don’t see the option to manage seats, contact our support team for help adding or removing users.
To add seats:
- Select the Gear Icon, then select Manage Team.
- Select Manage Seats. You’ll also see this option automatically if you try to add a new user and don’t have any seats available.
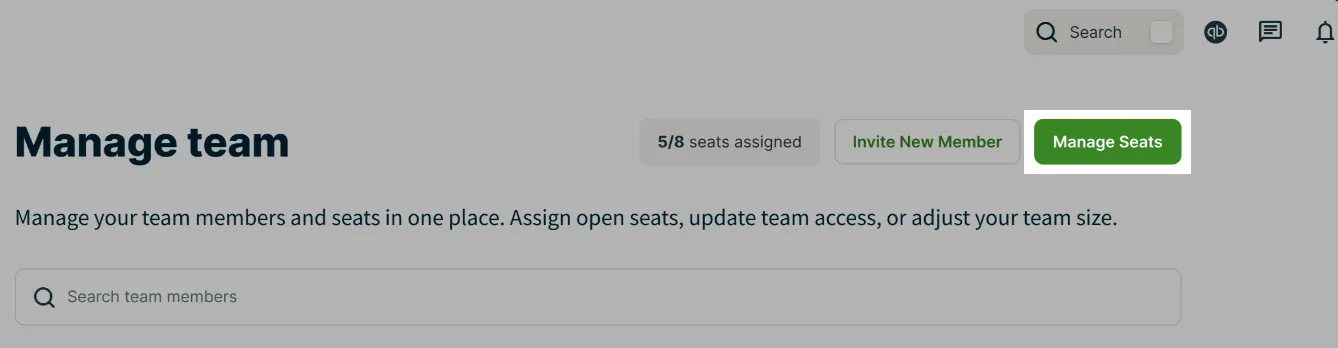
- Choose how many seats to add, then complete your purchase. You can purchase seats before assigning anyone to them.
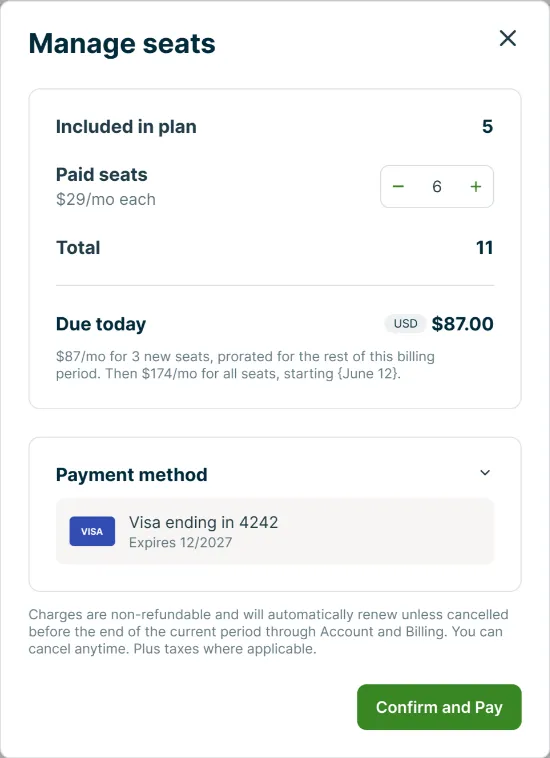
To stop paying for a seat:
- Select the Gear Icon, then select Manage Team.
- If someone is assigned to the seat, unassign them first. Unassigning removes their access to Jobber, but doesn’t cancel the seat on its own.
- Select Manage Seats.
- Lower the number of seats to the amount you need. You can only cancel seats that don’t have anyone assigned.
On the Manage Team page, team members with a seat appear under Assigned seats. Team members without a seat appear under Unassigned team members, where you can assign them a seat to give them access.
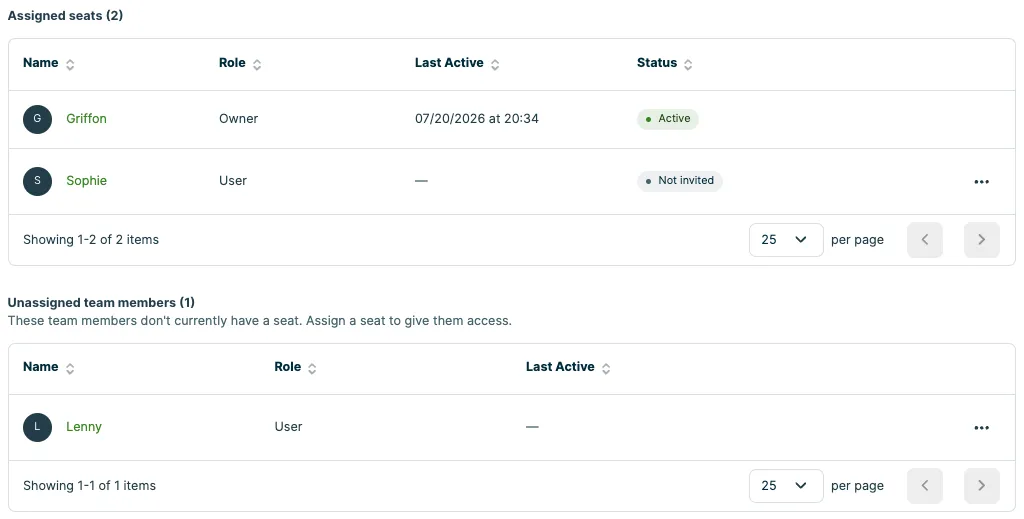
If you’re on the Core plan, you can add one additional seat. To add more, upgrade to Connect. View our current pricing plans.
Accept user invites
Once you’ve saved your user, an invitation will be sent via email and text message. The new user will need to click Accept the Invitation, once they do that they will be prompted to create a password and access Jobber under your account.
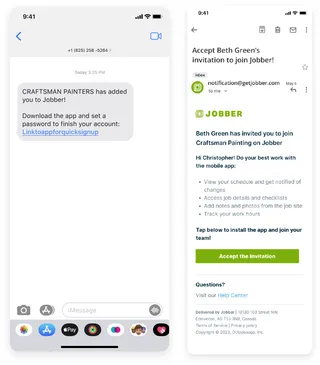
Learn more about joining a Jobber account
Manage users
If an update ever needs to be made to a user, such as adjusting their permissions or updating their contact information, the user can be edited.
Click the user’s name from the Manage Team page. Their information will open where you can make your updates. When you are done, click Save Profile.
Deactivate a user
To deactivate a team member:
- Click the Gear Icon.
- Select Manage Team from the menu.
- Find the team member you want to deactivate.
- Click the three dots next to their name.
- Choose Deactivate.
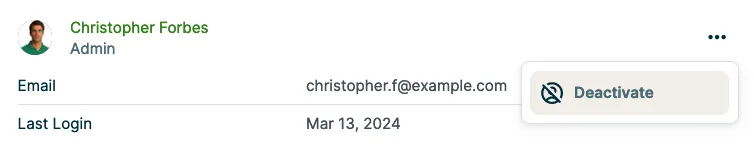
You can also deactivate them by clicking into their user profile. There will be a red Deactivate User button in the bottom left corner of the page.
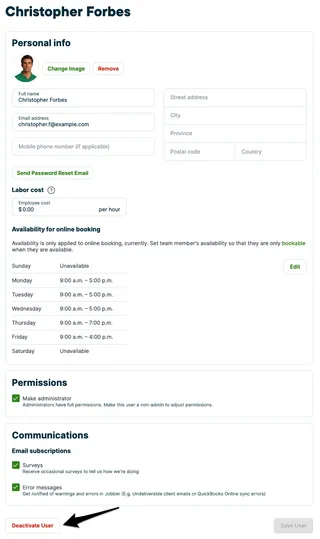
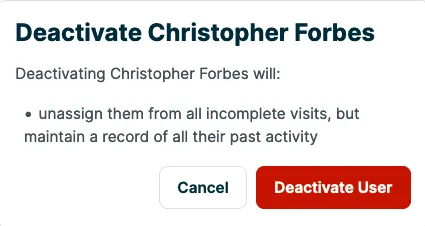
If you choose to deactivate a user, they will be unassigned from all incomplete items assigned to them on the calendar (visits, tasks, requests, reminders). It is recommended to re-assign their schedule to another user before deactivating them.
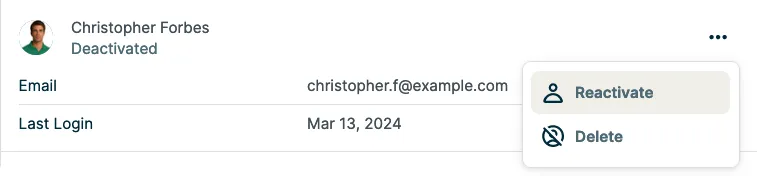
Deactivated users will still show on the Manage Team page, but at the end of your list of team members. To Delete or Reactivate each user, click the More Options Icon (three dots).
Note: Reactivating a user will not re-assign the work that was unassigned by deactivating them, they will need to be scheduled once more.
Delete a user
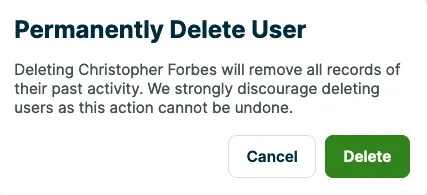
While deleting a user is possible, we recommend deactivating users instead. If a user is deleted from Jobber, all records of that user’s past activity is deleted as well. For example, you will no longer have access to their time entries or completed tasks on the calendar.
Deactivating a user still opens up a spot for another team member, so deleting them isn’t necessary if you want to add someone else as an active user.
If you are certain you would like to delete a user:
- Click the Gear Icon.
- Select Manage Team from the menu.
- Find the team member you want to deactivate.
- Click the three dots next to their name.
- Choose Delete.
You will be presented with a pop-up indicating that deleting users removes all records of their past activity and to confirm that you want to proceed with deleting the selected user.